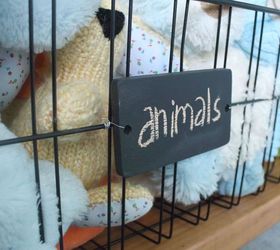
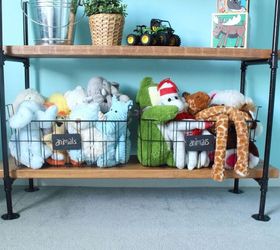
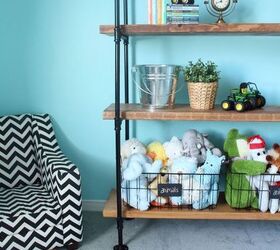
I’ve been in the middle of transitioning Jack’s bedroom, and by that I mean slowly piecing his room together with simple elements of design. Beforehand his room was just a whole lot of toys and pieces of furniture that were good enough for storage, we never really had a specific theme. After building a pretty cool industrial shelf, I knew it would be the perfect piece for Jack’s bedroom. Since then, I have been slowly adding, changing, and creating a theme wrapped around the industrial shelf! Here’s a little project I have been working on…Do you know what these are? If you guessed freezer baskets, BINGO! My parents had a few of these oldies sitting in their basement and I couldn't help but think how great they would be for Jack's stuffed animal storage. I sprayed them with some black Rustoleum paint, 2 coats to be exact.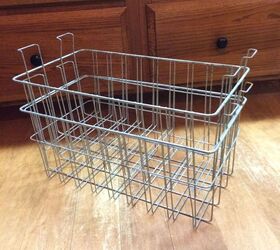 Step 1: Start with a piece of wood that is approximately 4″x 8″ x 1/4″
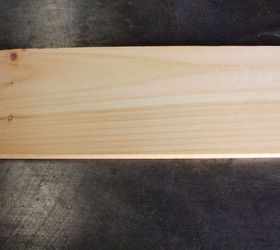 Step 2: Cut every 2″ and you will have 4 pieces that are 2″ x 4″ x 1/4″.
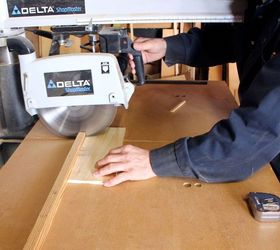 Step 3: Once each piece is cut, measure or eyeball a hole on each end and use a drill to create a hole for the wire or string that you plan to secure tag in place. Sand edges, corners and surface -- smooth as a baby's bum!
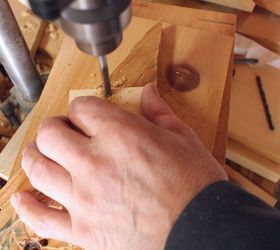 Step 4: The tags are ready for some chalkboard paint. Begin painting one side, let dry approximately 20 minutes, flip and paint other side. I did 3 coats in total. Tip* Use a q-tip to paint the inside of the hole, works wonders.
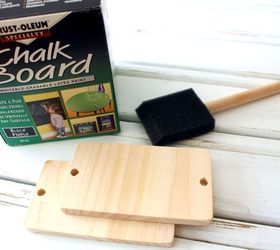 Step 5: Once your chalkboard labels are dry, approximately 24 hours, cut wire or string to secure tags in place.
 Step 6: Attach and write on the DIY chalkboard tags…Ta-da, your finished!
Original article and pictures take http://www.hometalk.com/12025371/diy-chalkboard-tags site
Комментариев нет:
Отправить комментарий