You can google them for sizes etc
I loved his original and this is a little more "rough and ready" but constructed without megabucks CNC mills etc, I have used tools that the home handyman is more likely to have access to, however, if anyone wants to buy me a CNC lathe/mill/laser cutter I won't say no!!
All the Ply I used was rescued from skips at work (it is old packing cases for pumps/motors etc) hence the marks and scuffs
TOOLS
I used various as I was experimenting, to find the easiest way to do each stage
But among them were
Band Saw
Dremel (various attachments)
Oscillating Saw (also known as a renovator)
Drill and various bits
Hand Fretsaw
Files
Sander
CONSUMABLES
Waterproof PVA adhesive
sandpaper/glasspape
Rare Earth Magnet
Since completing this I have bought a Scroll saw and may have a go at another one with this

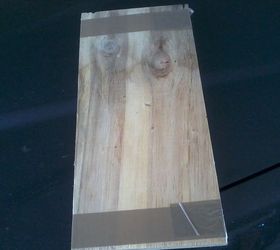
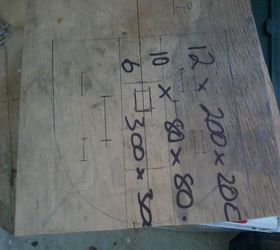
Now I thought the original pattern was awesome, simple, minimal and stylish. Unfortunately my computer wouldn't let me download Christians attachment so I drew my interpretation freehand, then photocopied it a few times so I could play with it. Once happy with it I stuck it on my Ply with watered down PVA adhesive. The Ply was taped together with parcel tape (this is for the 2 outer pieces --see next step)

So the ply was rescued from packing cases in the skips at work, hence it is a bit battered and dirty, still it will clean up and is free
The PVA was from the dollar shop (less than $5)

Now the original plan was to cut around the heads/ plume and the pegs on the feet and shield arm first, then glue the three pieces of Ply together and cut the rest so they were all exactly the same.
Needless to say, the best laid plans etc..................
I was using 18mm ply, thus 3 layers is 54mm, unfortunately my Bandsaw will only open to 45mm so MOD1
cut the centre piece with plume, and tape the remaining 2 pieces together and cut out, then assemble.
When cutting out I would recommend drilling holes at all the tight turn areas if using a bandsaw, I didn't and got stuck a couple of times-- like I say this is all about experimentation!
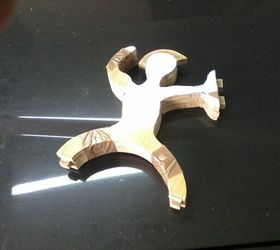
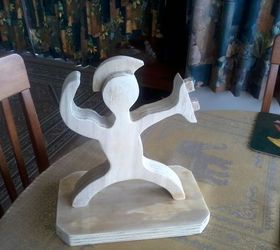
So eventually all 3 pieces were cut out and I glued them together.
Once dry I filed and sanded them down until they were nice and even. it took ages and I got a blister on my thumb!!! (Cue Money for Nothing by Dire Straits)
I found that the little cylindrical sanding attachments on the Dremel were pretty good for this
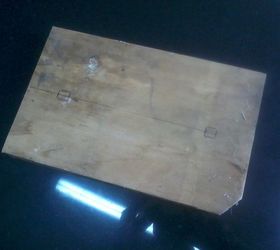
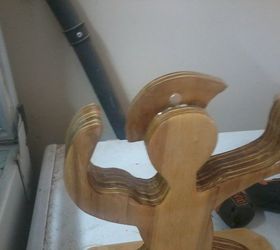
I didn't take many pics at this stage, however I cut 2 pieces of Ply and measured out where the 2 foot pegs were going to be on one piece.
I then drilled the 4 corners and cut out the rectangles for the foot pegs with a hand Fret saw (so basically ended up with 2 rectangular holes with "bunny ear" corners on the top piece) , checked fit and filed as required.
Once Happy with the fit I laminated the 2 pieces together and gave a damn good sanding.
Although I haven't photographed it I did the same process with the shield.
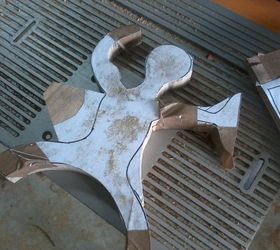
As you can see a marked up piece of ply (will sand down later)
Slots marked for knives and holes for attaching to arm
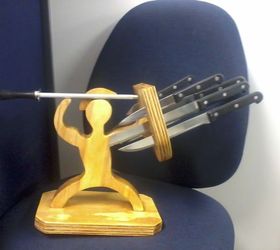
So all sanded and glued (lots of sanding!!) I started with 100 grit, gave it a coat of polyeurathane varnish and then sanded down to 400 grit and a couple more coats.
Drilled a small (8mm) hole in the plume and located the Rare earth magnet, this was glued in place.
I got the magnets off TradeMe (8 for about $6)
Unfortunately I didn't take any pictures of this step (tbh I was borderline going to chuck the whole thing in the bin it was so frustrating!!!)
However, I tried several different methods with various sucess
METHOD 1
Using my smallest router bit, I routed a slot, found that very difficult to control and get a decent cut, threw shield away
METHOD 2
Drill Hole and cut out with Hand Fretsaw,, result difficult to get two nice parallel cuts and need a largish drill hole to get the pinned blade in, threw shield away!
METHOD 3
Drill 3mm hole either end of slot and use Oscillating Saw to cut out, clean up edges/widen as required using Dremel grinding attachment, this worked pretty well (until the Oscillating saw blade broke), kept this one.
I then fitted the knives into the slots and "fettled" as required to get a good fit
Methods I may try if I make another one
1. Using the Scroll Saw now I have one
2. Using a Biscuit Jointer (on the 2 mating faces prior to laminating)
And so that's it hope you like!
Original article and pictures take http://www.hometalk.com/12348097/spartan-knife-block-diy site
Комментариев нет:
Отправить комментарий